Simple HTTP provides no encryption, leaving our traffic for anyone to read.
To use SSL, the encryption protocol in HTTPS, we need a certificate which is used during a handshake and confirms our identity as well as a private and public key. During a handshake the identites of connecting parties are confirmed and they use their public and private keys to encrypt and decrypt their conversation. That means that if someone intercepts our traffic they won't be able to read it or tamper with it, since the encrypted messages are signed with our certificates.
You can go to websites which provide paid or free certificates, but we're going to use a self signed certificate. A self-signed certificate will still show a warning on your browser, but we'd graduate to HTTPS.
I'll use openssl to generate self-signed certificates only for the reverse-proxy because it'll be facing the "outside world". Our attacker stays hidden behind it and will only get traffic from reverse-proxy.
Reverse-proxy:
apk add opensslGo to /etc/ssl/ and create a directory named 'private':
mkdir privateNow generate the public and private key's with the following command:
openssl req -x509 -nodes -days 365 -newkey rsa:2048 -keyout /etc/ssl/private/nginx-selfsigned.key -out /etc/ssl/certs/nginx-selfsigned.crtFill the requested fields however you want.
This has generated a certificate confirming your identity as well as a public and private key-pair needed for encrypted communication.
Next let's change our configuration to use HTTPS instead of HTTP.
In our reverse proxy let's configure '/etc/nginx/conf.d/default.conf'. We'll make it use port 443 for HTTPS, link our certificate and key and redirect any HTTP traffic to HTTPS.
server {
    listen       80 default_server;
    listen  [::]:80 default_server;
    server_name  proxy;
    return 301 https://$host$request_uri;
}

server {
    listen 443 ssl http2 default_server;
    listen [::]:443 ssl http2 default_server;
    ssl_certificate /etc/ssl/certs/nginx-selfsigned.crt;
    ssl_certificate_key /etc/ssl/private/nginx-selfsigned.key;

   #access_log  /var/log/nginx/host.access.log  main;

    location / {
        root   /usr/share/nginx/html;
        index  index.html index.htm;
    }

    location /merlin {
        proxy_pass http://172.17.0.3:5555/;
    }
    #error_page  404              /404.html;

    # redirect server error pages to the static page /50x.html
    #
    error_page   500 502 503 504  /50x.html;
    location = /50x.html {
        root   /usr/share/nginx/html;
    }
}
Test your config file with nginx -t and reload nginx with nginx -s reload.
Test! #
From our Victim container reach out to our Reverse-Proxy using HTTPS (we'll use -k flag to ignore the warning about the self-signed certificate).
curl -k https://172.17.0.2/We're getting the default nginx welcome page for our reverse proxy.
Let's see if we can reach the Attacker through /merlin.
curl -k https://172.17.0.2/merlinGreat!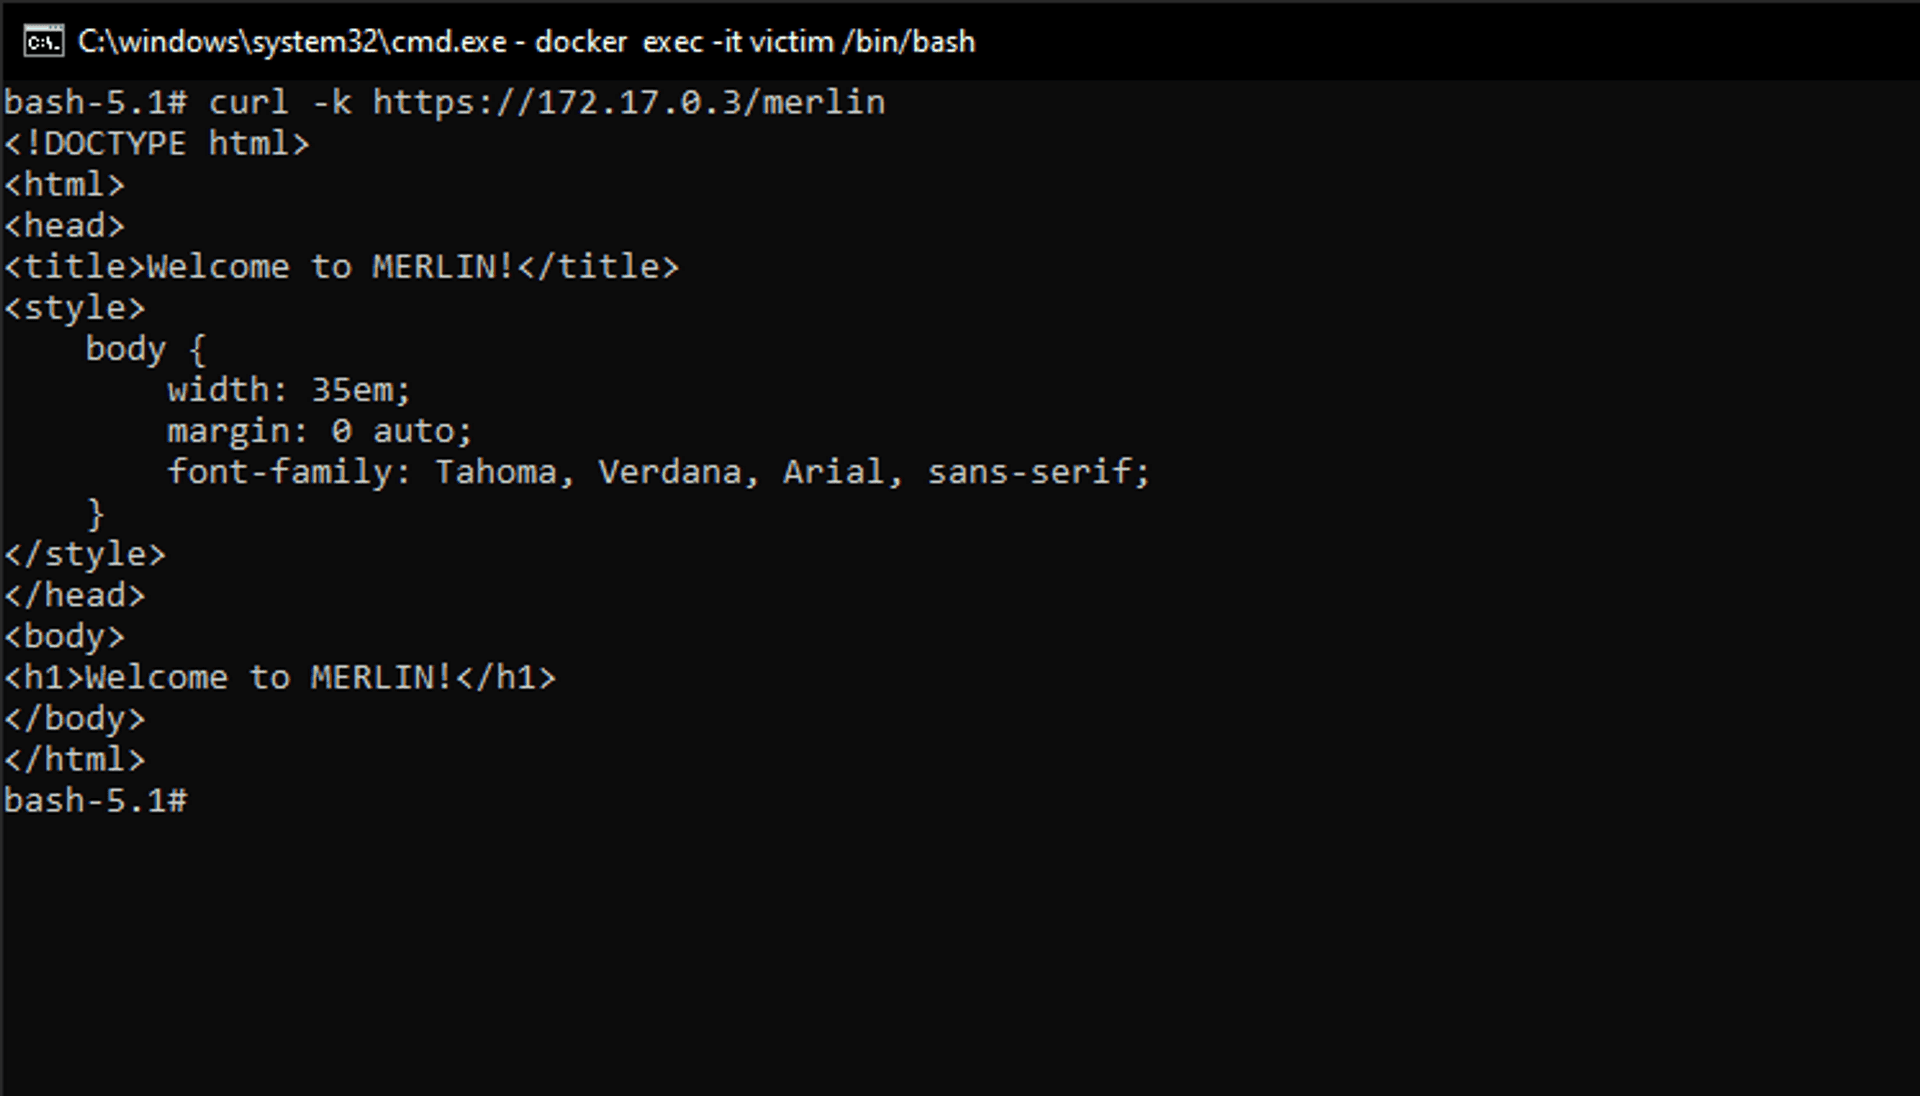
And if we try HTTP:
curl -I http://172.17.0.2
curl -I http://172.17.0.2/merlin
We'll be redirected to the HTTPS version of the site: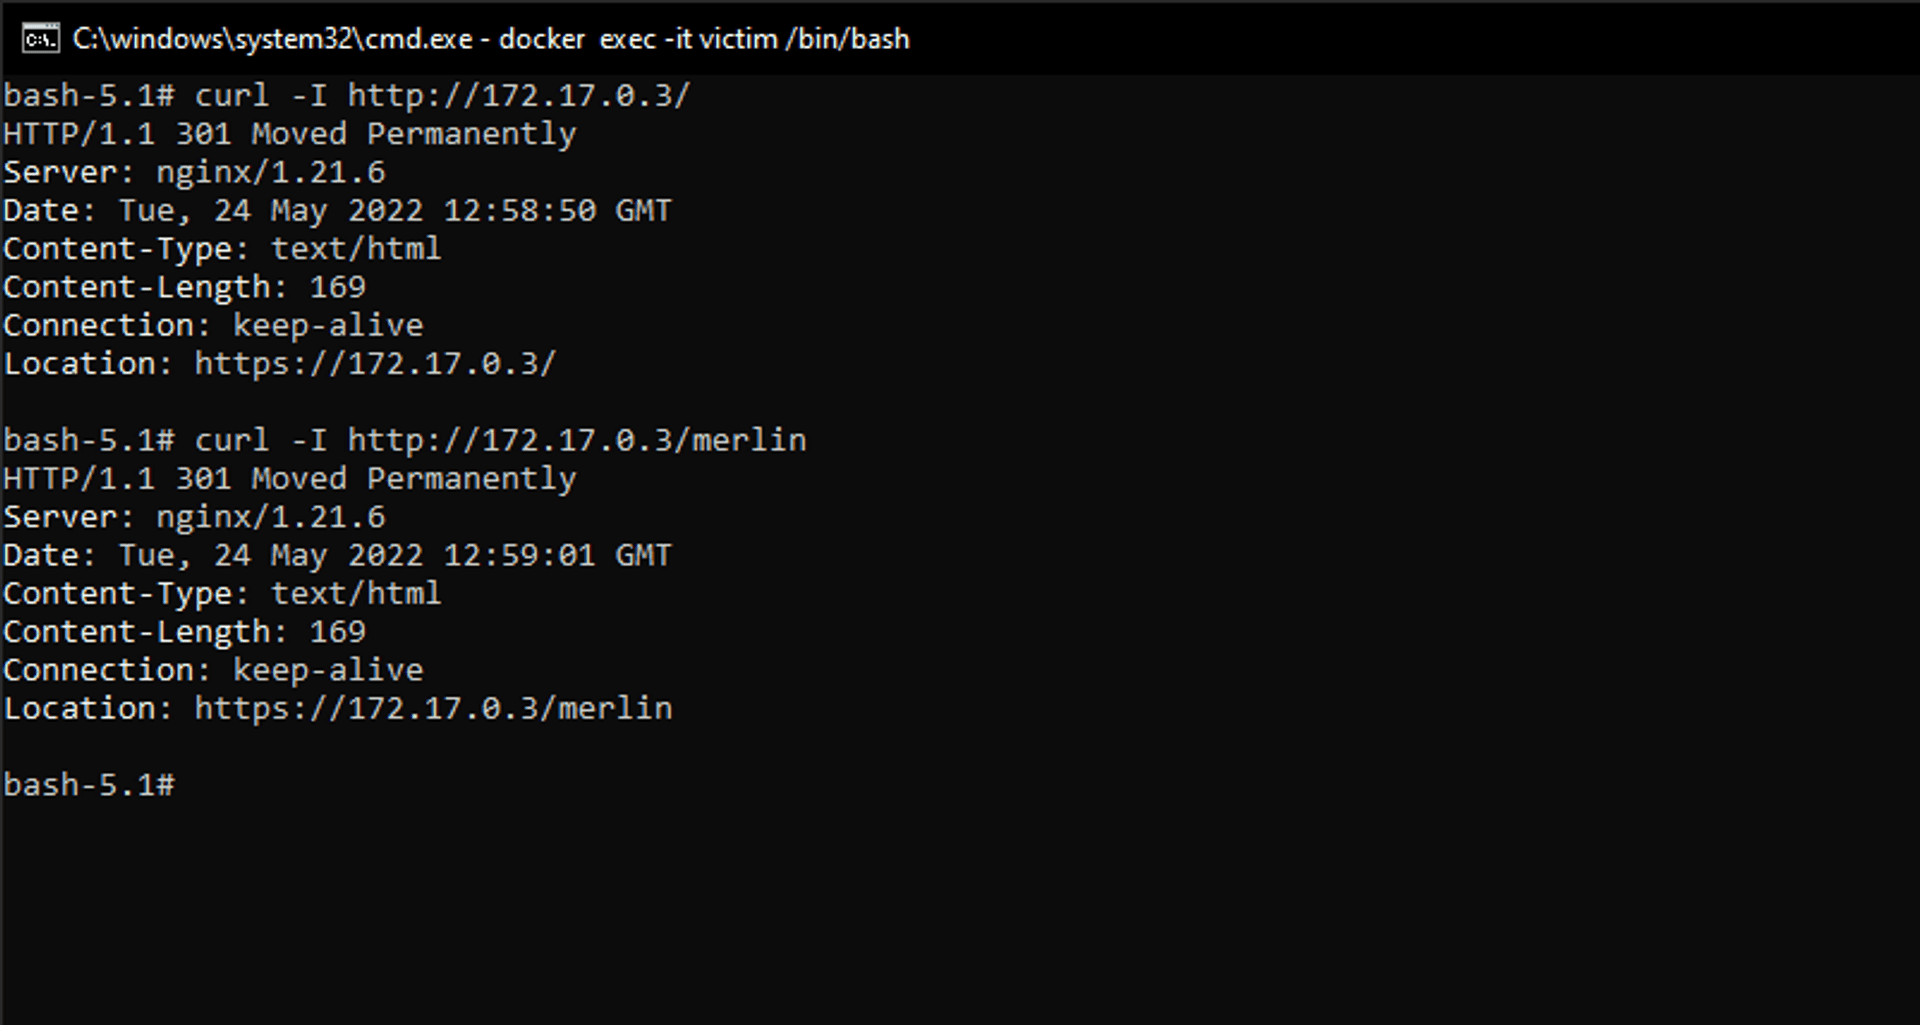
You might've noticed different IP addresses. That's because they can change with every container start-up. There are ways to make them permanent or use the container's name, but I couldn't be bothered.
Remember to check withip addrand adjust IP adresses where needed if you're doing this project over multiple days.
Previous step Creating a reverse-proxy.
Next step Time for RAT.
Published